Clean • Professional
When you build a web page, elements often overlap each other—like images on top of text, menus over backgrounds, or pop-ups above everything else.
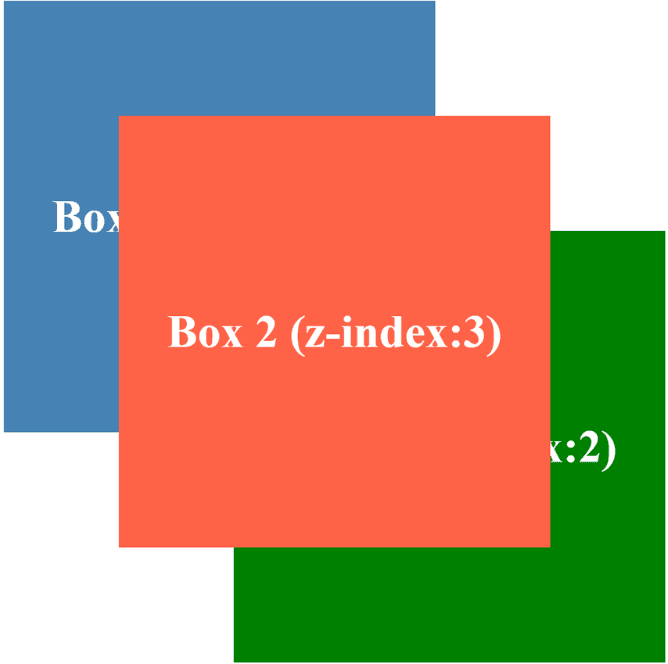
The CSS z-index property decides which element appears on top of which in the stacking order.
Think of your webpage as a pile of sheets of paper:
z-index value determines where each sheet lies in this stack.z-index only works on elements with a position property (relative, absolute, fixed, or sticky).position: static (default), z-index won’t apply..element {
position: relative; /* or absolute, fixed, sticky */
z-index: 2;
}
<!DOCTYPE html>
<html lang="en">
<head>
<meta charset="UTF-8">
<meta name="viewport" content="width=device-width, initial-scale=1.0">
<title>Z-Index Example</title>
<style>
  .box {
    width: 150px;
    height: 150px;
    position: absolute;
    color: white;
    font-weight: bold;
    display: flex;
    align-items: center;
    justify-content: center;
  }

  .box1 {
    background: steelblue;
    top: 40px;
    left: 40px;
    z-index: 1;
  }

  .box2 {
    background: tomato;
    top: 80px;
    left: 80px;
    z-index: 3; /* highest, appears on top */
  }

  .box3 {
    background: green;
    top: 120px;
    left: 120px;
    z-index: 2;
  }
</style>
</head>
<body>
  <div class="box box1">Box 1 (z-index:1)</div>
  <div class="box box2">Box 2 (z-index:3)</div>
  <div class="box box3">Box 3 (z-index:2)</div>
</body>
</html>
Output :

Higher z-index → Element appears on TOP
Lower z-index  → Element goes BEHIND

Example:

z-index: 3   →  Modal / Popup (Topmost Layer)
z-index: 2   →  Navigation Menu / Dropdown
z-index: 1   →  Content Box / Images
z-index: 0   →  Default Elements (normal flow)
z-index: -1  →  Background elements (behind content)
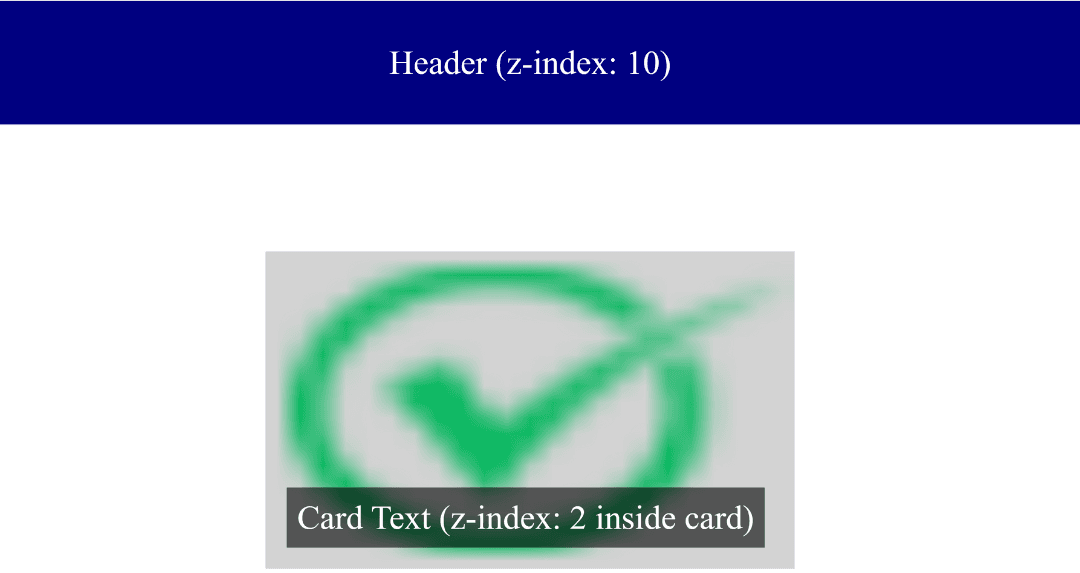
A stacking context is a separate 3D layer on a webpage where elements are arranged in their own stacking order.Each stacking context is independent — elements inside it can’t overlap elements from another context.
The whole page (<html>) is the root stacking context.
New stacking contexts are created when:
position (relative, absolute, fixed, sticky) with z-index.opacity is less than 1.transform, filter, clip-path, will-change are applied.<!DOCTYPE html>
<html lang="en">
<head>
<meta charset="UTF-8">
<meta name="viewport" content="width=device-width, initial-scale=1.0">
<title>Stacking Context Example</title>
<style>
.header {
position: relative;
z-index: 10;
background: navy;
color: white;
padding: 20px;
text-align: center;
}
.card {
position: relative;
width: 250px;
height: 150px;
margin: 60px auto;
background: lightgray;
transform: scale(1); /* creates new stacking context */
}
.card img {
position: absolute;
width: 100%;
height: 100%;
z-index: 1; /* inside card */
}
.card .text {
position: absolute;
bottom: 10px;
left: 10px;
z-index: 2; /* above image, but still inside card */
background: rgba(0,0,0,0.6);
color: white;
padding: 5px;
}
</style>
</head>
<body>
<div class="header">Header (z-index: 10)</div>
<div class="card">
<img src="checkedmark.png" alt="Card Image">
<div class="text">Card Text (z-index: 2 inside card)</div>
</div>
</body>
</html>
Output :
